A calculation field is the result of the mathematical expression of one or more fields used in the report.
The most common calculations used in producing reports are:
|
Equal |
VAR1 = = VAR2 |
|
Not Equal |
VAR1 ! = VAR2 |
|
Greater than |
VAR1 > VAR2 |
|
Less than |
VAR1 < VAR2 |
|
Greater than or Equal |
VAR1 >= VAR2 |
|
Less than or Equal |
VAR1 <= VAR2 |
|
Satisfies condition 1 and 2 |
COND1 && COND2 |
|
Satisfies condition 1 or 2 |
COND1 | | COND2 |
Note that VAR = variable and COND = condition.
Calculations cannot appear in Question sections.
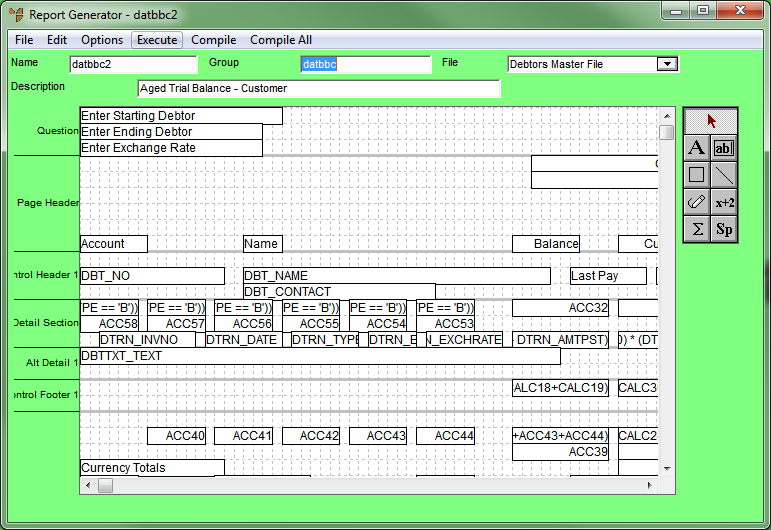
As an example, calculation fields are included in the Debtors Aged Trial Balance.
Aged Trial Balance - Customer
You can double click on a calculation field (e.g. CALC19) to view its details.
To add a calculation field:
Refer to "Edit - Add Field".
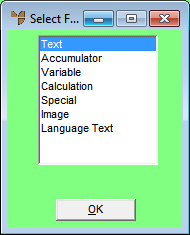
Micronet displays the Edit Calculation screen.
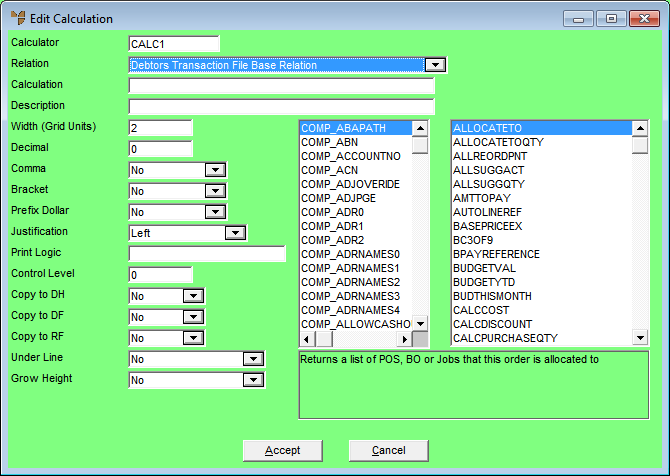
Micronet displays a list of Report Generator functions, along with their current definitions, in the second pane at the right of the screen. The first pane shows the variables that you can use with those functions.
|
|

|
Technical Tip You can display this screen quickly by selecting the Calculation Tool on the Report Generator toolbar and then clicking on the report where you want the calculation field to be added.
|
|
|
Field |
Value |
|
|
Calculator |
Micronet displays the next number for the calculation field in this report, e.g. CALC9. You can change this name if required. |
|
|
Relation |
Select a relation on which the calculation is based, i.e. where the fields in the calculation come from. |
|
|
Calculation |
Double click on the function at the right of the screen that you want to use for the calculation, e.g. GP returns the gross profit as a percentage. Then double click on a variable to use with that function. You can also type in these details if you know them. Note that this field is case sensitive and that spaces are not required between the calculations. The result of this expression is what will be displayed for this field. An example of a calculation is: DBT_CURRENT/11 This calculation will get the value of the debtor’s current balance (DBT_CURRENT) and divide the result by 11. For more information about these Report Generator functions and parameters, refer to "Report Generator Functions and Parameters". |
|
|
Description |
Enter the description to be displayed in the page header if Copy to DH is set to Yes. |
|
|
Width (Grid Units) |
Enter the length of the field on the report in grid units. This defaults to the maximum size the field can be (as pre-set in Micronet). |
|
|
Decimal |
Enter the number of decimal places to be displayed. |
|
|
Comma |
Select Yes if you want commas inserted to break up numbers in thousands, or No if you don't. |
|
|
Bracket |
Select Yes if you want brackets inserted around negative numbers, or No if you don't. |
|
|
Prefix Dollar |
Select Yes if you want this field prefixed with a $ symbol, or No if you don't. |
|
|
Justification |
Select whether output is to be left justified, centred or right justified. |
|
|
Print Logic |
Enter any condition where the field is to be displayed if the condition is valid. For example, this would be used in the invoice format where you only want the Sales Tax field to be shown if the debtor is a wholesale debtor. Therefore in the Print Logic field of the Sales Tax field on the report, you would enter: DBT_RETAIL = = 'W'. This will only print the field when the debtor is a wholesale debtor. 0 = Does not print |
|
|
Control Level |
Enter the control break level for the data to be displayed. For more information about control breaks, refer to "Options - Control Breaks". |
|
|
Copy to DH |
Select Yes if you want to make a text field using the Description as the column heading and placing it in the page header. |
|
|
Copy to DF |
Select Yes if you want to add an accumulator to the page footer for this calculation field. |
|
|
Copy to RF |
Select Yes if you want to add an accumulator to the report footer for this calculation field. |
|
|
Under Line |
Select whether you want a single or double line to be printed on the report before or after your variable field, or select No for no line. |
|
|
Grow Height |
Select Yes if you want to wrap text where the data does not fit in the field, or No if you don't. |
Micronet redisplays the Report Generator screen for the selected report. If you used the Calculation Tool to insert the calculation field, the field displays where you clicked.
If you used menu options to insert the calculation field, Micronet displays a rectangle which moves with the cursor.
Micronet inserts the calculation field on the report where you clicked.

